OPAL Data Drive Encryption
Many hard drives now encrypt data by default. Generally this is AES-256 or some variant of that. While hardware encryption sounds great, you might wonder how to take advantage of it. By default, that encryption is completely transparent to the end user. The keys and data are stored directly in the drive. When you move the drive from one system to another, the data can be accessed immediately when you plug it in.
So what’s the value of encryption? It makes actions like formatting namespaces easier. In the past when you formatted a drive, you would write zeros to the whole disk. That is an expensive operation on a SSD and takes away from the life of the overall drive. Therefore a typical format command simply rotates the encryption keys on the backing controller. That effectively wipes all of the data off the drive by doing a cryptographic erase.
This is all well and good, but encryption implies that you have some control over the keys and you can control who sees that data. In order to get that level of control, you need a technology like TCG Opal or Ruby.
Trusted Computing Group (TCG) Opal
The Opal Specification provides a means for securing a drive. It is supported on both standard disks (ex. SATA and SAS) as well as NVMe drives. But you need to make sure your drive actually supports the specification.
The Opal specification is common in consumer drives, and the Ruby specification is becoming more common in enterprise drives. There is significant overlap between the two, but here we’ll focus on Opal. The Opal spec allows you to define locking areas on a drive. Generally your locking area will be the entire drive, but you can actually be more granular than that.
When you’ve enabled locking, the drive will go to a locked state when power is removed from the device. When power is added back, the drive will be unusable. Read/write operations will fail.
I’ll show you how to set up locking on a data drive, the life cycle for it, and how to manage it.
Before You Begin
The first thing you want to do is make sure that your drive is TCG Opal compliant. This is usually in the drive specification. You will also want to write down the Physical Security ID (PSID) of the drive.
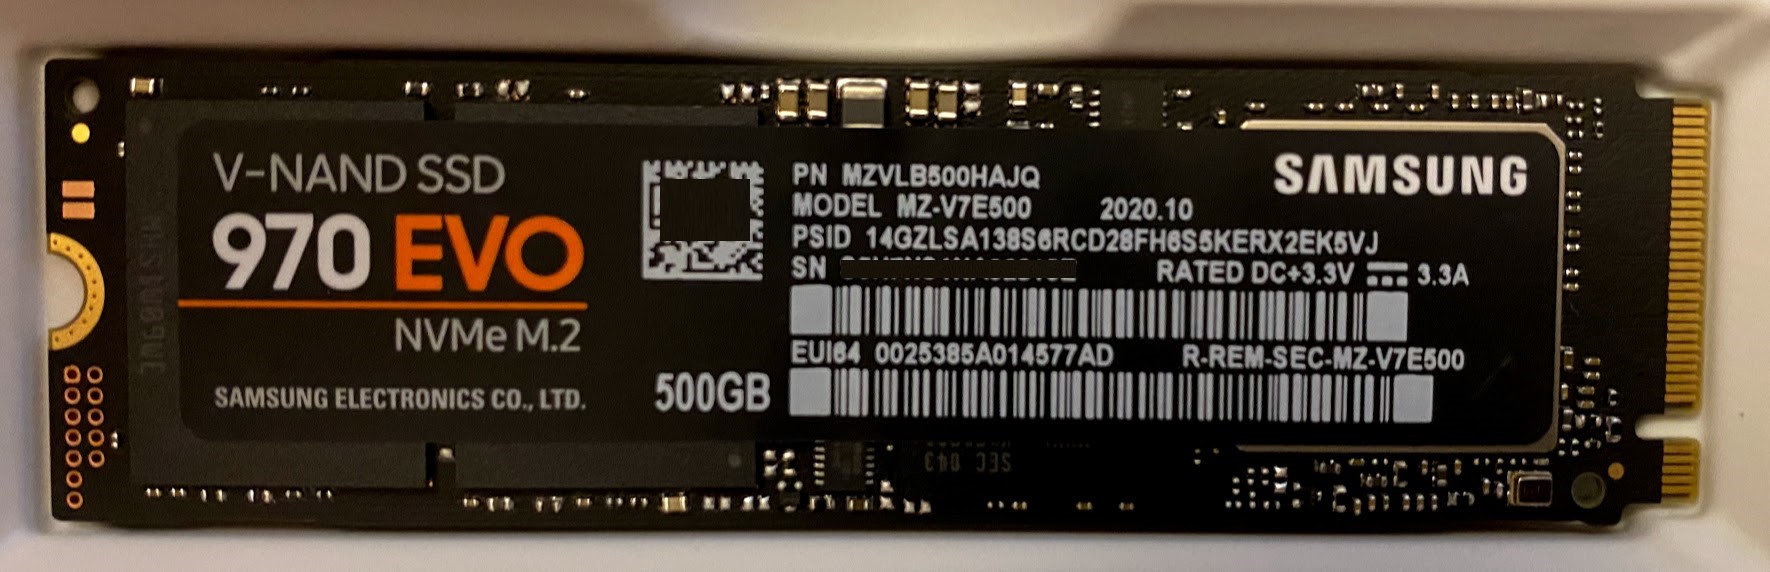
The PSID is a 32 digit alphanumeric number. It is printed on the drive and is used to reset the drive in the event you’ve lost the password. When this happens, all the data will be wiped - but you’ll be able to use the drive again.
We’ll use the PSID in this tutorial. Be aware if you’re following along, you will lose all the data on the drive when you do this.
You also need to download a utility to configure the drive. Common on Linux, and what I’ll use below, is sedutil-cli. It has binaries here. Unpack the appropriate binary to your box before you begin.
Detecting OPAL Capabilities
You’ll first start out with a scan and query command. The scan will detect which drives in your system are Opal capable, and which are not. Opal works on NVMe, SATA or SAS drives, but I only have NVMe in the box below.
[root@smc-server GNU-Linux]# ./sedutil-cli --scan
Scanning for Opal compliant disks
/dev/nvme0  2  SAMSUNG MZWLJ1T9HBJR-00007               EPK98B5Q
/dev/nvme1  2  Samsung SSD 970 EVO 500GB                2B2QEXE7
No more disks present ending scan
This shows two different devices that are Opal compliant. The /dev/nvme1
device is my boot device, so I’ll stay away from that for now. In the future
I’ll touch on how to handle boot devices with Opal.
I’ll only be modifying my data device /dev/nvme0. If we scan it’s
capabilities, we get the following.
[root@smc-server GNU-Linux]# ./sedutil-cli --query /dev/nvme0

/dev/nvme0 NVMe SAMSUNG MZWLJ1T9HBJR-00007               EPK98B5Q S4YNNE0N801309
TPer function (0x0001)
    ACKNAK = N, ASYNC = N. BufferManagement = N, comIDManagement  = N, Streaming = Y, SYNC = Y
Locking function (0x0002)
    Locked = N, LockingEnabled = N, LockingSupported = Y, MBRDone = N, MBREnabled = N, MediaEncrypt = Y
Geometry function (0x0003)
    Align = Y, Alignment Granularity = 16 (8192), Logical Block size = 512, Lowest Aligned LBA = 0
SingleUser function (0x0201)
    ALL = N, ANY = N, Policy = Y, Locking Objects = 9
DataStore function (0x0202)
    Max Tables = 9, Max Size Tables = 10485760, Table size alignment = 1
OPAL 2.0 function (0x0203)
    Base comID = 0x1004, Initial PIN = 0x0, Reverted PIN = 0x0, comIDs = 1
    Locking Admins = 4, Locking Users = 9, Range Crossing = Y
**** 1 **** Unknown function codes IGNORED

TPer Properties:
  MaxComPacketSize = 66048  MaxResponseComPacketSize = 66048
  MaxPacketSize = 66028  MaxIndTokenSize = 65540  MaxPackets = 1
  MaxSubpackets = 1  MaxMethods = 1  MaxAuthentications = 5
  MaxSessions = 1  MaxTransactionLimit = 1  DefSessionTimeout = 0

Host Properties:
  MaxComPacketSize = 2048  MaxResponseComPacketSize = 2048
  MaxPacketSize = 2028  MaxIndTokenSize = 1992  MaxPackets = 1
  MaxSubpackets = 1  MaxMethods = 1
There’s a lot here. Let’s focus only on the Locking function. There are a few things in there:
- Locked: The device is not currently locked. If it were, I wouldn’t be able to read from it.
- LockingEnabled: This is simply stating whether or not the device has enabled locking. If LockingEnabled is Y, then when the device loses power it will be in locked mode.
- LockingSupported: Simply indicates if locking can be done on the device.
- MBRDone: Is the
Master Boot Recordis done. This is needed if you’re going to use Opal with a boot device. - MBREnabled: Is the
Master Boot Recordhas been enabled. - MediaEncrypt: I believe this means whether or not the media itself is encrypted.
Configuring OPAL on a Data Drive
To start, we will run some commands to set a password and set that we want the entire disk Llocking enabled.
[root@smc-server GNU-Linux]# ./sedutil-cli --initialSetup passw0rd /dev/nvme0
takeOwnership complete
Locking SP Activate Complete
LockingRange0 disabled
LockingRange0 set to RW
method status code NOT_AUTHORIZED
Set Failed
Unable to update table
Unable to set setMBRDone on
Initial setup failed - unable to Enable MBR shadow
[root@smc-server GNU-Linux]# ./sedutil-cli --query /dev/nvme0

/dev/nvme0 NVMe SAMSUNG MZWLJ1T9HBJR-00007               EPK98B5Q S4YNNE0N801309
TPer function (0x0001)
    ACKNAK = N, ASYNC = N. BufferManagement = N, comIDManagement  = N, Streaming = Y, SYNC = Y
Locking function (0x0002)
    Locked = N, LockingEnabled = Y, LockingSupported = Y, MBRDone = N, MBREnabled = N, MediaEncrypt = Y
Geometry function (0x0003)
    Align = Y, Alignment Granularity = 16 (8192), Logical Block size = 512, Lowest Aligned LBA = 0
SingleUser function (0x0201)
    ALL = N, ANY = N, Policy = Y, Locking Objects = 9
DataStore function (0x0202)
    Max Tables = 9, Max Size Tables = 10485760, Table size alignment = 1
OPAL 2.0 function (0x0203)
    Base comID = 0x1004, Initial PIN = 0x0, Reverted PIN = 0x0, comIDs = 1
    Locking Admins = 4, Locking Users = 9, Range Crossing = Y
**** 1 **** Unknown function codes IGNORED

TPer Properties:
  MaxComPacketSize = 66048  MaxResponseComPacketSize = 66048
  MaxPacketSize = 66028  MaxIndTokenSize = 65540  MaxPackets = 1
  MaxSubpackets = 1  MaxMethods = 1  MaxAuthentications = 5
  MaxSessions = 1  MaxTransactionLimit = 1  DefSessionTimeout = 0

Host Properties:
  MaxComPacketSize = 2048  MaxResponseComPacketSize = 2048
  MaxPacketSize = 2028  MaxIndTokenSize = 1992  MaxPackets = 1
  MaxSubpackets = 1  MaxMethods = 1
Couple things to note in here. The first is that it looks like the initialSetup failed. This is simply the by-product of the fact that the Samsung drive I’m using (PM1733) does not appear to have a MBR space. This implies to me that it’s more in line with the TCG Ruby spec vs. Opal. However that’s OK for the purposes of a data drive.
Second is that the drive now has LockingEnabled = Y. This indicates that the
drive will lock at the next power loss of the drive. But lastly before you do
that, you have to give it a locking range that will be affected.
[root@smc-server thorst]# sedutil-cli --enablelockingrange 0 passw0rd /dev/nvme0
LockingRange0 enabled ReadLocking,WriteLocking
[root@smc-server ~]# sedutil-cli --setLockingRange 0 LK passw0rd /dev/nvme0
LockingRange0 set to LK
[root@smc-server ~]# ./sedutil-cli --query /dev/nvme0

/dev/nvme0 NVMe SAMSUNG MZWLJ1T9HBJR-00007               EPK98B5Q S4YNNE0N801309
TPer function (0x0001)
    ACKNAK = N, ASYNC = N. BufferManagement = N, comIDManagement  = N, Streaming = Y, SYNC = Y
Locking function (0x0002)
    Locked = N, LockingEnabled = Y, LockingSupported = Y, MBRDone = N, MBREnabled = N, MediaEncrypt = Y
Geometry function (0x0003)
    Align = Y, Alignment Granularity = 16 (8192), Logical Block size = 512, Lowest Aligned LBA = 0
SingleUser function (0x0201)
    ALL = N, ANY = N, Policy = Y, Locking Objects = 9
DataStore function (0x0202)
    Max Tables = 9, Max Size Tables = 10485760, Table size alignment = 1
OPAL 2.0 function (0x0203)
    Base comID = 0x1004, Initial PIN = 0x0, Reverted PIN = 0x0, comIDs = 1
    Locking Admins = 4, Locking Users = 9, Range Crossing = Y
**** 1 **** Unknown function codes IGNORED

TPer Properties:
  MaxComPacketSize = 66048  MaxResponseComPacketSize = 66048
  MaxPacketSize = 66028  MaxIndTokenSize = 65540  MaxPackets = 1
  MaxSubpackets = 1  MaxMethods = 1  MaxAuthentications = 5
  MaxSessions = 1  MaxTransactionLimit = 1  DefSessionTimeout = 0

Host Properties:
  MaxComPacketSize = 2048  MaxResponseComPacketSize = 2048
  MaxPacketSize = 2028  MaxIndTokenSize = 1992  MaxPackets = 1
  MaxSubpackets = 1  MaxMethods = 1
[root@smc-server ~]#
The enableLockingRange tells the system to enable the global locking range. 0
in this case means global, which in effect means the whole drive. The
setLockingRange command tells it what action to take when it loses power
basically. Again using 0, wjocj indicates the global range (whole drive). LK
indicates you want the drive full locked. The rest is your password and device.
Next up is seeing if it worked.
Locking the Drive
To test the locking, I’ve simply powered off and back on my server.
[thorst@smc-server ~]$ su
Password:
[root@smc-server thorst]# sedutil-cli --query /dev/nvme0

/dev/nvme0 NVMe SAMSUNG MZWLJ1T9HBJR-00007               EPK98B5Q S4YNNE0N801309
TPer function (0x0001)
    ACKNAK = N, ASYNC = N. BufferManagement = N, comIDManagement  = N, Streaming = Y, SYNC = Y
Locking function (0x0002)
    Locked = Y, LockingEnabled = Y, LockingSupported = Y, MBRDone = N, MBREnabled = N, MediaEncrypt = Y
Geometry function (0x0003)
    Align = Y, Alignment Granularity = 16 (8192), Logical Block size = 512, Lowest Aligned LBA = 0
SingleUser function (0x0201)
    ALL = N, ANY = N, Policy = Y, Locking Objects = 9
DataStore function (0x0202)
    Max Tables = 9, Max Size Tables = 10485760, Table size alignment = 1
OPAL 2.0 function (0x0203)
    Base comID = 0x1004, Initial PIN = 0x0, Reverted PIN = 0x0, comIDs = 1
    Locking Admins = 4, Locking Users = 9, Range Crossing = Y
**** 1 **** Unknown function codes IGNORED

TPer Properties:
  MaxComPacketSize = 66048  MaxResponseComPacketSize = 66048
  MaxPacketSize = 66028  MaxIndTokenSize = 65540  MaxPackets = 1
  MaxSubpackets = 1  MaxMethods = 1  MaxAuthentications = 5
  MaxSessions = 1  MaxTransactionLimit = 1  DefSessionTimeout = 0

Host Properties:
  MaxComPacketSize = 2048  MaxResponseComPacketSize = 2048
  MaxPacketSize = 2028  MaxIndTokenSize = 1992  MaxPackets = 1
  MaxSubpackets = 1  MaxMethods = 1
[root@smc-server thorst]#
The key here is that Locked = Y. That indicates that the drive is now locked.
A simple way to test this would be to run a simple fio command against it.
[root@smc-server thorst]# sudo fio --name=4krandwrite --iodepth=1 --rw=randwrite \
    --bs=4k --runtime=5 --group_reporting --numjobs=1 --sync=1 --direct=1 \
    --size=100% --filename=/dev/nvme0n1
4krandwrite: (g=0): rw=randwrite, bs=(R) 4096B-4096B, (W) 4096B-4096B, (T) 4096B-4096B, ioengine=psync, iodepth=1
fio-3.7
Starting 1 process
fio: io_u error on file /dev/nvme0n1: No data available: write offset=115824627712, buflen=4096
4krandwrite: No I/O performed by psync, perhaps try --debug=io option for details?
fio: pid=1708, err=61/file:io_u.c:1747, func=io_u error, error=No data available

4krandwrite: (groupid=0, jobs=1): err=61 (file:io_u.c:1747, func=io_u error, error=No data available): pid=1708: Sun Dec  6 20:51:16 2020
  cpu          : usr=22.22%, sys=0.00%, ctx=1, majf=0, minf=15
  IO depths    : 1=100.0%, 2=0.0%, 4=0.0%, 8=0.0%, 16=0.0%, 32=0.0%, >=64=0.0%
     submit    : 0=0.0%, 4=100.0%, 8=0.0%, 16=0.0%, 32=0.0%, 64=0.0%, >=64=0.0%
     complete  : 0=50.0%, 4=50.0%, 8=0.0%, 16=0.0%, 32=0.0%, 64=0.0%, >=64=0.0%
     issued rwts: total=0,1,0,0 short=0,0,0,0 dropped=0,0,0,0
     latency   : target=0, window=0, percentile=100.00%, depth=1

Run status group 0 (all jobs):

Disk stats (read/write):
  nvme0n1: ios=0/0, merge=0/0, ticks=0/0, in_queue=0, util=0.00%
This fails instantly. It says “No I/O performed by psync”. Basically the drive can’t be written to. If we flip this to a read command, we get similar results.
Unlocking the Drive for Daily Use
Now that the drive is locked, how do we get the data back? Fairly simple.
[root@smc-server thorst]# sedutil-cli --setLockingRange 0 RW passw0rd /dev/nvme0
LockingRange0 set to RW
[root@smc-server thorst]# sudo fio --name=4krandread --iodepth=1 --rw=randread \
    --bs=4k --runtime=5 --group_reporting --numjobs=1 --sync=1 --direct=1 \
    --size=100% --filename=/dev/nvme0n1
4krandread: (g=0): rw=randread, bs=(R) 4096B-4096B, (W) 4096B-4096B, (T) 4096B-4096B, ioengine=psync, iodepth=1
fio-3.7
Starting 1 process
Jobs: 1 (f=1): [r(1)][100.0%][r=210MiB/s,w=0KiB/s][r=53.7k,w=0 IOPS][eta 00m:00s]
4krandread: (groupid=0, jobs=1): err= 0: pid=1671: Sun Dec  6 21:05:04 2020
   read: IOPS=53.8k, BW=210MiB/s (221MB/s)(1052MiB/5001msec)
    clat (usec): min=15, max=1541, avg=18.23, stdev= 4.95
     lat (usec): min=15, max=1541, avg=18.26, stdev= 4.95
    clat percentiles (nsec):
     |  1.00th=[15424],  5.00th=[15552], 10.00th=[15808], 20.00th=[16192],
     | 30.00th=[16768], 40.00th=[17536], 50.00th=[18048], 60.00th=[18560],
     | 70.00th=[18816], 80.00th=[19328], 90.00th=[19840], 95.00th=[20096],
     | 99.00th=[29312], 99.50th=[32640], 99.90th=[42752], 99.95th=[43264],
     | 99.99th=[53504]
   bw (  KiB/s): min=213640, max=218976, per=100.00%, avg=215426.67, stdev=1640.98, samples=9
   iops        : min=53410, max=54744, avg=53856.67, stdev=410.24, samples=9
  lat (usec)   : 20=93.77%, 50=6.21%, 100=0.01%, 500=0.01%
  lat (msec)   : 2=0.01%
  cpu          : usr=3.28%, sys=6.24%, ctx=269251, majf=0, minf=10
  IO depths    : 1=100.0%, 2=0.0%, 4=0.0%, 8=0.0%, 16=0.0%, 32=0.0%, >=64=0.0%
     submit    : 0=0.0%, 4=100.0%, 8=0.0%, 16=0.0%, 32=0.0%, 64=0.0%, >=64=0.0%
     complete  : 0=0.0%, 4=100.0%, 8=0.0%, 16=0.0%, 32=0.0%, 64=0.0%, >=64=0.0%
     issued rwts: total=269251,0,0,0 short=0,0,0,0 dropped=0,0,0,0
     latency   : target=0, window=0, percentile=100.00%, depth=1

Run status group 0 (all jobs):
   READ: bw=210MiB/s (221MB/s), 210MiB/s-210MiB/s (221MB/s-221MB/s), io=1052MiB (1103MB), run=5001-5001msec

Disk stats (read/write):
  nvme0n1: ios=263524/0, merge=0/0, ticks=4368/0, in_queue=0, util=97.96%
[root@smc-server thorst]#
All looks well now. And the next time you turn off your system, it’ll lock up again.
Disabling the Locking Range
If you want to disable the locking range, but keep the password’s in tact, you can run the following
[root@smc-server thorst]# sedutil-cli --disableLockingRange 0 passw0rd /dev/nvme0
LockingRange0 disabled
When you do this, the password will still be on the device but it won’t be locked automatically on a shutdown event.
Reseting the Drive, but Retain Data
You can reset the security on the drive, but maintain the data on it too. That
is a simple --revertNoErase command.
[root@smc-server thorst]# sedutil-cli --revertNoErase passw0rd /dev/nvme0
Revert LockingSP complete
[root@smc-server thorst]# sedutil-cli --query /dev/nvme0

/dev/nvme0 NVMe SAMSUNG MZWLJ1T9HBJR-00007               EPK98B5Q S4YNNE0N801309
TPer function (0x0001)
    ACKNAK = N, ASYNC = N. BufferManagement = N, comIDManagement  = N, Streaming = Y, SYNC = Y
Locking function (0x0002)
    Locked = N, LockingEnabled = N, LockingSupported = Y, MBRDone = N, MBREnabled = N, MediaEncrypt = Y
Geometry function (0x0003)
    Align = Y, Alignment Granularity = 16 (8192), Logical Block size = 512, Lowest Aligned LBA = 0
SingleUser function (0x0201)
    ALL = N, ANY = N, Policy = Y, Locking Objects = 9
DataStore function (0x0202)
    Max Tables = 9, Max Size Tables = 10485760, Table size alignment = 1
OPAL 2.0 function (0x0203)
    Base comID = 0x1004, Initial PIN = 0x0, Reverted PIN = 0x0, comIDs = 1
    Locking Admins = 4, Locking Users = 9, Range Crossing = Y
**** 1 **** Unknown function codes IGNORED

TPer Properties:
  MaxComPacketSize = 66048  MaxResponseComPacketSize = 66048
  MaxPacketSize = 66028  MaxIndTokenSize = 65540  MaxPackets = 1
  MaxSubpackets = 1  MaxMethods = 1  MaxAuthentications = 5
  MaxSessions = 1  MaxTransactionLimit = 1  DefSessionTimeout = 0

Host Properties:
  MaxComPacketSize = 2048  MaxResponseComPacketSize = 2048
  MaxPacketSize = 2028  MaxIndTokenSize = 1992  MaxPackets = 1
  MaxSubpackets = 1  MaxMethods = 1
[root@smc-server thorst]#
As you can see, the LockingEnabled = N and Locked = N give strong indication
you’re back to normal. You would have to run the --initialSetup again at this
point.
PSID Revert
Let’s say you gave a drive to someone else, and they enabled OPAL on it. They were just making sure that the data wasn’t going to get away from them. But now they’ve returned it and you need a way to reset the drive. You can’t run standard format commands because at this point the drive is locked.
This is the purpose of the PSID revert. PSID stands for Physical Security ID. It’s generally on the label of the drive, and I asked you to take note of it at the beginning of the article.
The PSID revert is basically a factory reset. The PSID revert wipes out the security keys and does a full erase of the drive. While the namespaces may stick around, the data within them will be lost.
This is something you want to run if you’re in a multi tenant environment sharing drives between tenants. Before the drive changes hands, you probably want to run a PSID revert.
To do so, it’s pretty simple and a little funny.
[root@smc-server thorst]# sedutil-cli --yesIreallywanttoERASEALLmydatausingthePSID \
  3N0TPR5ULCQ4C7BSLG1KE5LRAY2W8LTX /dev/nvme0
revertTper completed successfully
[root@smc-server thorst]#
The developers must have thought they were saving someone from a fat finger there. But, it serves it’s purpose well enough.
If you get the PSID wrong, you’ll just get a basic error.
[root@smc-server thorst]# sedutil-cli --yesIreallywanttoERASEALLmydatausingthePSID \
  12345678901234567890123456789012 /dev/nvme0
method status code NOT_AUTHORIZED
Session start failed rc = 1
One or more header fields have 0 length
EndSession Failed
[root@smc-server thorst]#
That’s all there really is to a basic OPAL implementation on a data disk using a global locking range. It gets more complicated for boot devices, or if you want to have multiple locking ranges. But this is a basic overview to get you started.